QuickBooks Online MCP Server - add QuickBooks tool to any AI (like Claude)

Video Introduction
Want to automate your inbox or need a custom workflow? 📞 Book a Call | 💬 DM me on Linkedin
What This Workflow Does
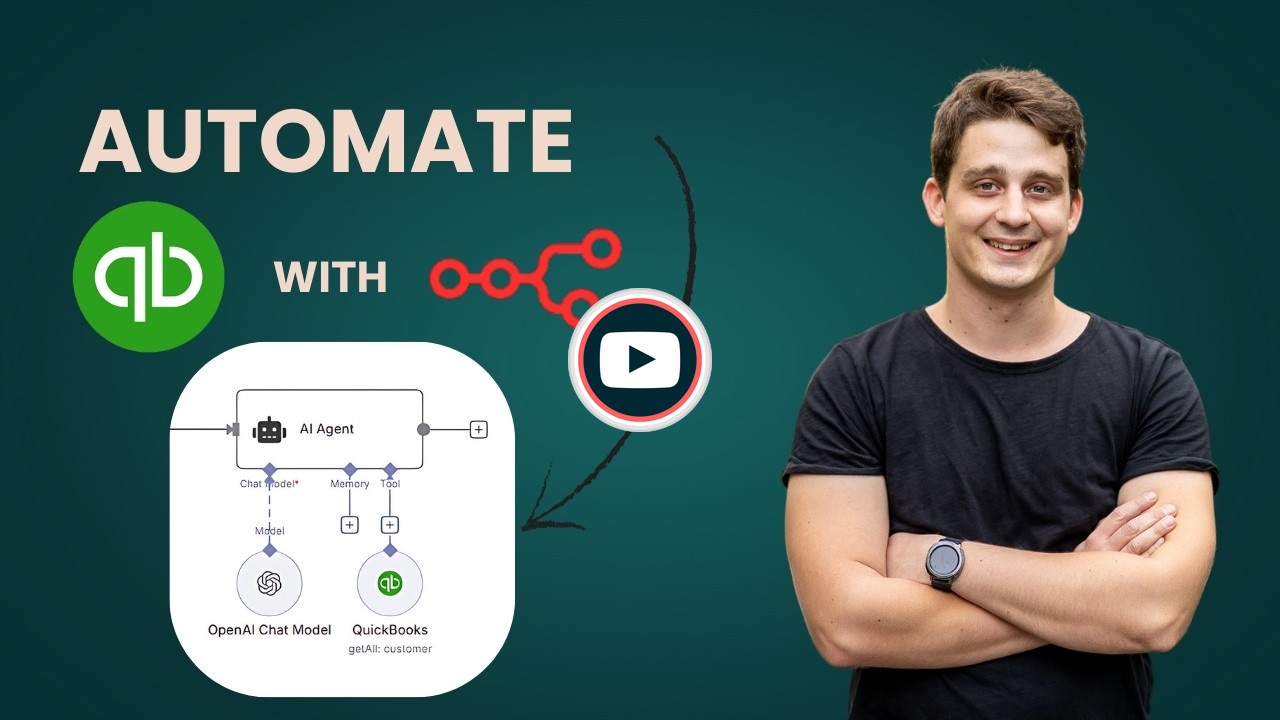
This workflow creates an AI-powered chatbot that can answer natural language questions about your QuickBooks Online data. Using OpenAI's GPT models and the Model Context Protocol (MCP), the agent can retrieve customer information, analyze balances, and provide insights through a conversational interface. Users can simply ask questions like "How many customers do we have?" or "What's our total customer balance?" and get instant answers from live QuickBooks data.
Key Features
- Natural language queries: Ask questions about your QuickBooks data in plain English
- MCP architecture: Uses Model Context Protocol to manage tools efficiently, making it easy to expand with additional QuickBooks operations
- Public chat interface: Share the chatbot URL with team members who need QuickBooks insights without direct access
- Real-time data: Queries live QuickBooks data for up-to-date answers
Common Use Cases
- Customer service teams checking account balances without logging into QuickBooks
- Sales teams quickly looking up customer information
- Finance teams getting quick answers about customer data
- Managers monitoring key metrics through conversational queries
Setup Requirements
QuickBooks Developer Account: Register at developer.intuit.com and create an app with Accounting scope permissions. You'll receive a Client ID and Client Secret.
Configure OAuth: In your Intuit Developer dashboard, add the redirect URL provided by n8n when creating QuickBooks credentials. Set the environment to Sandbox for testing, or complete Intuit's app approval process for Production use.
OpenAI API: Add your OpenAI API credentials to power the chat model. The workflow uses GPT-4.1-mini by default, but you can select other models based on your performance and cost requirements.
Chat Access: The chat trigger is set to public by default. Configure access settings based on your security requirements before sharing the chat URL.
n8n QuickBooks Online MCP Server - Add QuickBooks Tool to Any AI Like Claude
This n8n workflow acts as a server for the Model Context Protocol (MCP), enabling you to integrate QuickBooks Online functionalities as a tool for any AI agent that supports MCP, such as Claude. It effectively exposes QuickBooks Online operations to your AI, allowing it to interact with your accounting data.
What it does
This workflow sets up an MCP server that provides a "QuickBooks Online" tool to connected AI clients.
- Listens for MCP Requests: The workflow is triggered by incoming requests from an MCP client (e.g., an AI agent).
- Provides QuickBooks Online Tool: It registers a "QuickBooks Online" tool, making its capabilities available to the AI agent.
- Processes AI Agent Actions: An AI Agent node is configured to use an OpenAI Chat Model to process the requests and decide when to utilize the QuickBooks Online tool.
- Responds to MCP Client: The workflow then returns the AI agent's response, potentially including results from QuickBooks Online operations, back to the MCP client.
Prerequisites/Requirements
- n8n Instance: A running n8n instance.
- OpenAI API Key: For the OpenAI Chat Model.
- QuickBooks Online Account: With appropriate credentials configured in n8n (not explicitly shown in the JSON but implied by the "QuickBooks Online" tool name).
- An AI Client supporting MCP: Such as Claude or another AI agent capable of connecting to an MCP server.
Setup/Usage
- Import the Workflow: Import the provided JSON into your n8n instance.
- Configure Credentials:
- OpenAI Chat Model: Configure your OpenAI API Key credentials in the "OpenAI Chat Model" node.
- QuickBooks Online: Ensure you have QuickBooks Online credentials set up in n8n. While the "MCP Client Tool" node doesn't directly show QuickBooks credentials, the tool it provides would rely on existing n8n QuickBooks Online credentials.
- Activate the Workflow: Save and activate the workflow.
- Connect your AI Client: Configure your AI client (e.g., Claude) to connect to this n8n MCP server endpoint. The "MCP Server Trigger" node will provide the necessary URL once the workflow is active.
- Interact with your AI: Your AI agent can now be prompted to perform tasks related to QuickBooks Online, utilizing the tool provided by this workflow. For example, you could ask your AI to "list recent invoices" or "create a new customer."
Related Templates
Dynamic Hubspot lead routing with GPT-4 and Airtable sales team distribution
AI Agent for Dynamic Lead Distribution (HubSpot + Airtable) 🧠 AI-Powered Lead Routing and Sales Team Distribution This intelligent n8n workflow automates end-to-end lead qualification and allocation by integrating HubSpot, Airtable, OpenAI, Gmail, and Slack. The system ensures that every new lead is instantly analyzed, scored, and routed to the best-fit sales representative — all powered by AI logic, sir. --- 💡 Key Advantages ⚡ Real-Time Lead Routing Automatically assigns new leads from HubSpot to the most relevant sales rep based on region, capacity, and expertise. 🧠 AI Qualification Engine An OpenAI-powered Agent evaluates the lead’s industry, region, and needs to generate a persona summary and routing rationale. 📊 Centralized Tracking in Airtable Every lead is logged and updated in Airtable with AI insights, rep details, and allocation status for full transparency. 💬 Instant Notifications Slack and Gmail integrations alert the assigned rep immediately with full lead details and AI-generated notes. 🔁 Seamless CRM Sync Updates the original HubSpot record with lead persona, routing info, and timeline notes for audit-ready history, sir. --- ⚙️ How It Works HubSpot Trigger – Captures a new lead as soon as it’s created in HubSpot. Fetch Contact Data – Retrieves all relevant fields like name, company, and industry. Clean & Format Data – A Code node standardizes and structures the data for consistency. Airtable Record Creation – Logs the lead data into the “Leads” table for centralized tracking. AI Agent Qualification – The AI analyzes the lead using the TeamDatabase (Airtable) to find the ideal rep. Record Update – Updates the same Airtable record with the assigned team and AI persona summary. Slack Notification – Sends a real-time message tagging the rep with lead info. Gmail Notification – Sends a personalized handoff email with context and follow-up actions. HubSpot Sync – Updates the original contact in HubSpot with the assignment details and AI rationale, sir. --- 🛠️ Setup Steps Trigger Node: HubSpot → Detect new leads. HubSpot Node: Retrieve complete lead details. Code Node: Clean and normalize data. Airtable Node: Log lead info in the “Leads” table. AI Agent Node: Process lead and match with sales team. Slack Node: Notify the designated representative. Gmail Node: Email the rep with details. HubSpot Node: Update CRM with AI summary and allocation status, sir. --- 🔐 Credentials Required HubSpot OAuth2 API – To fetch and update leads. Airtable Personal Access Token – To store and update lead data. OpenAI API – To power the AI qualification and matching logic. Slack OAuth2 – For sending team notifications. Gmail OAuth2 – For automatic email alerts to assigned reps, sir. --- 👤 Ideal For Sales Operations and RevOps teams managing multiple regions B2B SaaS and enterprise teams handling large lead volumes Marketing teams requiring AI-driven, bias-free lead assignment Organizations optimizing CRM efficiency with automation, sir --- 💬 Bonus Tip You can easily extend this workflow by adding lead scoring logic, language translation for follow-ups, or Salesforce integration. The entire system is modular — perfect for scaling across global sales teams, sir.
 By MANISH KUMAR
Track daily moods with AI analysis & reports using GPT-4o, Data Tables & Gmail
Track your daily mood in one tap and receive automated AI summaries of your emotional trends every week and month. Perfect for self-reflection, wellness tracking, or personal analytics. This workflow logs moods sent through a webhook (/mood) into Data Tables, analyzes them weekly and monthly with OpenAI (GPT-4o), and emails you clear summaries and actionable recommendations via Gmail. ⚙️ How It Works Webhook – Mood → Collects new entries (🙂, 😐, or 😩) plus an optional note. Set Mood Data → Adds date, hour, and note fields automatically. Insert Mood Row → Stores each record in a Data Table. Weekly Schedule (Sunday 20:00) → Aggregates the last 7 days and sends a summarized report. Monthly Schedule (Day 1 at 08:00) → Aggregates the last 30 days for a deeper AI analysis. OpenAI Analysis → Generates insights, patterns, and 3 actionable recommendations. Gmail → Sends the full report (chart + AI text) to your inbox. 📊 Example Auto-Email Weekly Mood Summary (last 7 days) 🙂 5 ██████████ 😐 2 ████ 😩 0 Average: 1.7 (Positive 🙂) AI Insights: You’re trending upward this week — notes show that exercise days improved mood. Try keeping short walks mid-week to stabilize energy. 🧩 Requirements n8n Data Tables enabled OpenAI credential (GPT-4o or GPT-4 Turbo) Gmail OAuth2 credential to send summaries 🔧 Setup Instructions Connect your credentials: Add your own OpenAI and Gmail OAuth2 credentials. Set your Data Table ID: Open the Insert Mood Row node and enter your own Data Table ID. Without this, new moods won’t be stored. Replace the email placeholder: In the Gmail nodes, replace your.email@example.com with your actual address. Deploy and run: Send a test POST request to /mood (e.g. { "mood": "🙂", "note": "productive day" }) to log your first entry. ⚠️ Before activating the workflow, ensure you have configured the Data Table ID in the “Insert Mood Row” node. 🧠 AI Analysis Interprets mood patterns using GPT-4o. Highlights trends, potential triggers, and suggests 3 specific actions. Runs automatically every week and month. 🔒 Security No personal data is exposed outside your n8n instance. Always remove or anonymize credential references before sharing publicly. 💡 Ideal For Personal mood journaling and AI feedback Therapists tracking client progress Productivity or self-quantification projects 🗒️ Sticky Notes Guide 🟡 Mood Logging Webhook POST /mood receives mood + optional note. ⚠️ Configure your own Data Table ID in the “Insert Mood Row” node before running. 🟢 Weekly Summary Runs every Sunday 20:00 → aggregates last 7 days → generates AI insights + emails report. 🔵 Monthly Summary Runs on Day 1 at 08:00 → aggregates last 30 days → creates monthly reflection. 🟣 AI Analysis Uses OpenAI GPT-4o to interpret trends and recommend actions. 🟠 Email Delivery Sends formatted summaries to your inbox automatically.
 By Jose Castillo
Create, update, and get a person from Copper
This workflow allows you to create, update, and get a person from Copper. Copper node: This node will create a new person in Copper. Copper1 node: This node will update the information of the person that we created using the previous node. Copper2 node: This node will retrieve the information of the person that we created earlier.
 By Harshil Agrawal